
Street Shooting With A Nikonus
I have always wanted to do more shooting in the rain and what better way than with un underwater camera 🙂
 Nikonus V, Fuji Superia 200 ISO Film.
Autumn
Autumn is upon us…
A leaf on my flat bed scanner, with a box over it for a black background. I love how it feels like its just floating there 🙂
Enjoy
 CanoScan 9000F Scanner.
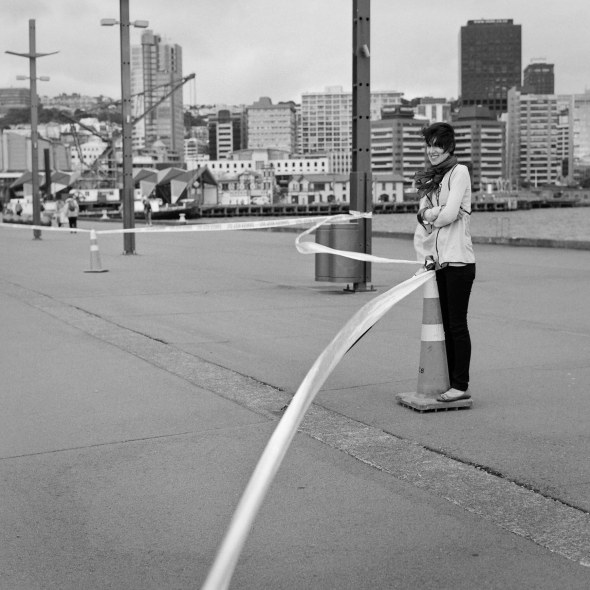
Performance Arcade Set-up Images And Time-Lapse
This was a while ago now but with moving house and quite a few technical issues with the time-lapse processing have meant that it was only completed today something like four weeks after it happened. The Performance Arcade is part of the Wellington Fringe Festival and involves art installations in and around a whole bunch on large shipping containers.
I had been contacted by Jo, one of the organisers due to an older post( HERE ) I put up and asked if I wanted to come and take some shots around this years event. I had been interested in trying out some more time-lapse photography over a longer period of time so asked when the containers were due to be dropped off.
It turned out that it was scheduled to happen on a Monday and the window of delivery was 7am until 7pm so this worked out perfectly for a long time-lapse.
The day turned out to be really windy and cloudy and due to safety I spend most of the day standing up road cones that had blown over and then as the wind got stronger in the afternoon standing beside my camera to make sure it wouldn’t blow over as well.
I did manage to get a few shot with Rollei as well though when the wind wasn’t too gusty.
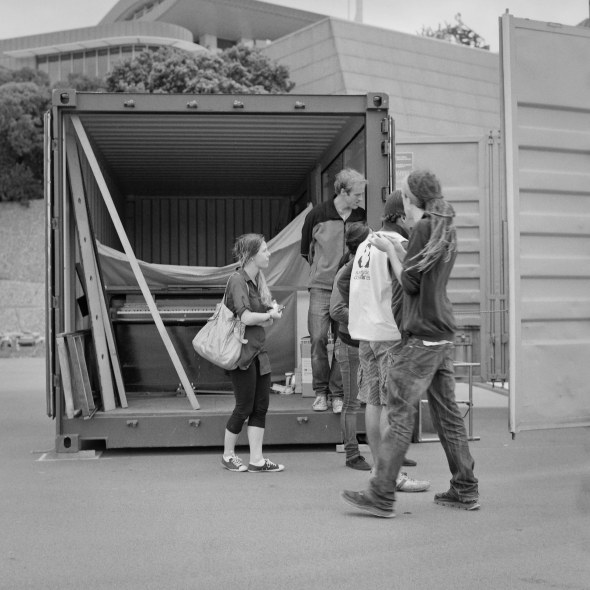
The really sucky thing was that I was moving house from Wednesday and didn’t get to go back as planned and shoot a whole heap more time-lapses of people setting up individual containers or members of the public interacting with the installations .
I guess there is always next year… The video is at the bottom of the page
Enjoy
Did I mention it was not only windy but cold too…

Cone re-adjustment…
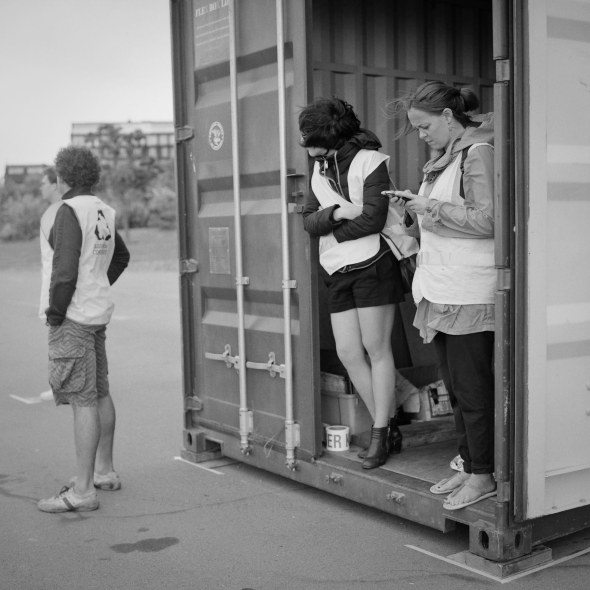
It was warmer and more sheltered inside the containers…

Marty the truck driver could seriously put a container anywhere…
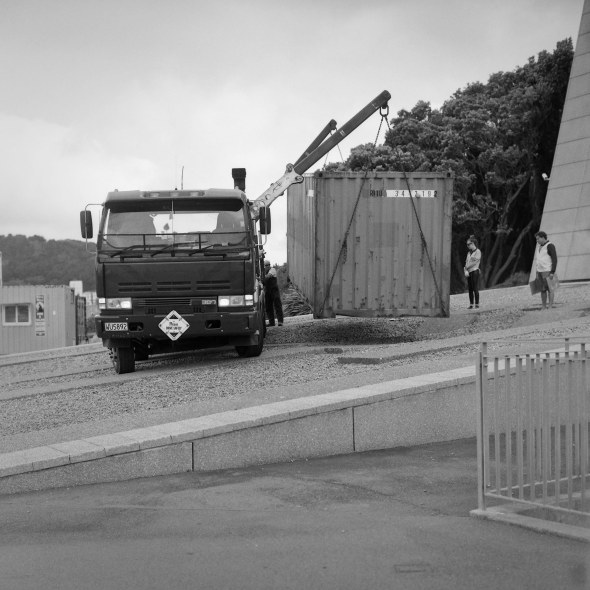
And mean anywhere…
About an hour after I started shooting it started to lightly rain and the only plastic bag I could find was from someone’s lunch. On the first attempt to put it over the camera a gust of wind blew it away which resulted in a chase followed by me falling over just missing it and then three people chasing it round the containers 🙂 fun times. I got away with only minor injuries…
Still Images: Rolleiflex 2.8 E, Ilford HP5+ 400 ISO Film, CanoScan 9000F Scanner
Video: Nikon D90, Sigma 12- 24mm Lens.
More Light Painting Experimentation
A bit more experimentation with light painting…
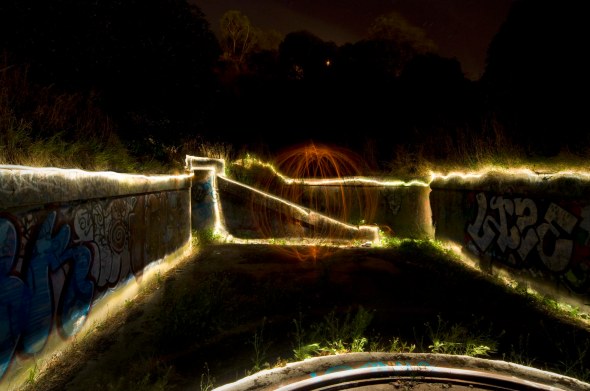
Nikon D90, Sigma 12-24mm Lens.
Back From Holiday And A Test Shot
Happy New Year!
I’ve pretty much only just got back from a months holiday (which was AWESOME!) so hopefully you should see some posts turning up again.
While I was away I took a stupid amount of film and now I have a stupid amount of developing to do….. So it might be digi shots for a bit til I get sorted
The shot below is a test shot I did using my D90 with the intention to go back and shoot a super long exposure on film. Unfortunately I didn’t get back to take the one on film 😦
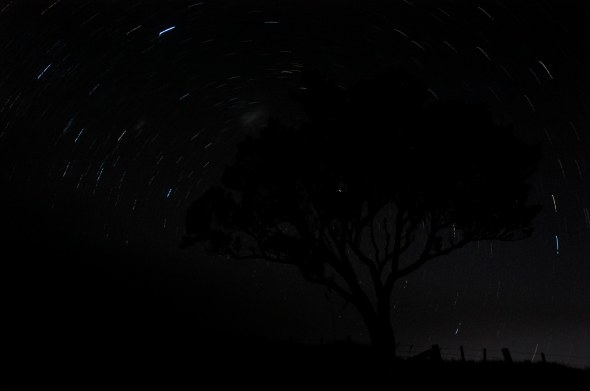 Nikon D90, Sigma 12-24mm Lens, ISO 200
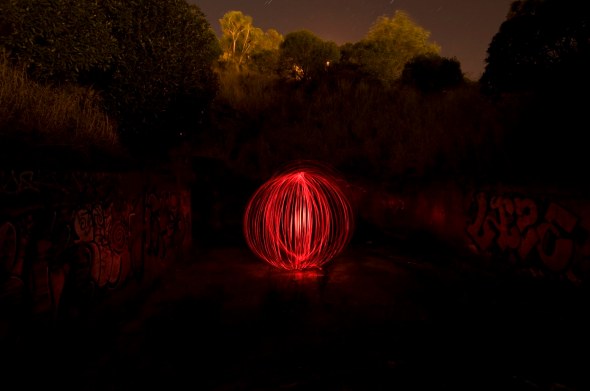
Balls Of Light At Kau Point

Revisted Kau Point again yesterday afternoon and since we had been there last it looks like someone had a bit of a party there, complete with generator, smoke machine and they even put in a toilet and shower. It didn’t feel half as spooky as it did the first time we were there.
I hadn’t tried balls of light for a while so decided this was the place to have anther go… Still need to work on my technique a bit to get the balls perfectly spherical but was happy with a least one of them 🙂


Nikon D90, Sigma 12-24mm Lens, ISO 400.
More Holga Panos

Sorry have been a bit slack putting up posts of late… Youngest daughter is in “constant stream of talking” mode which makes it a bit hard to concentrate for longer than more than 3 seconds (she has interrupted 3 times just in this sentence).
This combined with 7 rolls of film sitting round waiting to be developed means I having been getting on with things as much as I probably should…
Anyhow here goes some more shots from the Holga Pano camera I converted 🙂 Enjoy.


 Holga 120 GFN with custom 35mm Panoramic Adaptor, Ilford Delta 100 ISO Film, CanoScan 9000F Scanner.
Fort Opau Holga Pano
A couple of Holga Panos from a few weeks ago when I went out to Fort Opau, an old WW2 gun emplacement.


Holga 120 Camera with Custom 35mm Pano Adaptor, Ilford Delta 100 ISO Film, CanoScan 9000F Scanner.
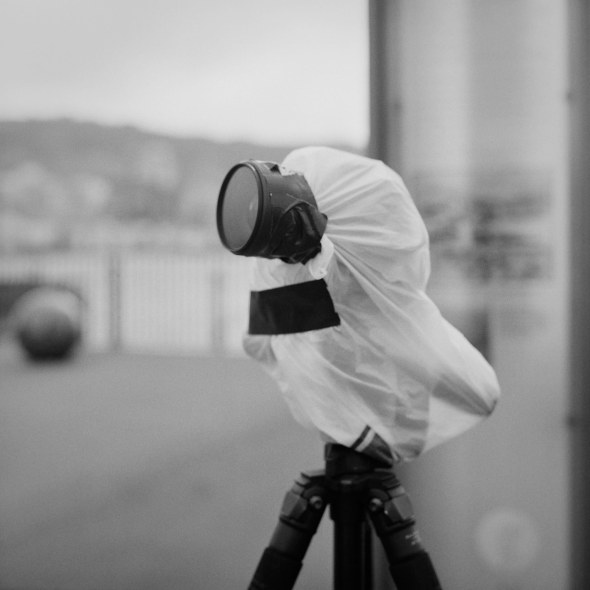
Photog On The Storm
A shot of Fergus setting up a shot while I was waiting around for my tide timelapse to finish… Sometimes I think we may be borderline crazy…
 Rolleiflex 2.8 E, Ilford HP5+ 400 ISO Film, CanoScan 9000F Scanner.
Holga Pano
Another test shot from my converted Holga… The frame goes all the way to the edge of the film but my scanner wouldn’t let me scan with the right exposure so I had to use the 35mm scanner adaptor which didn’t give the sprocket holes 😦
I really need to make that scanner mask…
 Holga 120 with Custom 35mm Panoramic Adaptor, Fuji Superia 200 ISO Film, CanoScan 9000F Scanner.
How To Change A Holga 35mm Adaptor To A Panoramic 35mm Adaptor

The other day I found The front of a Holga 120 camera whilst roaming the city. It had obviously been outside for a while and the battery contacts for the flash were missing but it still seemed to be in pretty good working order, just missing the back.
I had always wanted to convert one of these into a 35mm Panoramic camera and even though you can buy adaptors that will do this, without the sprocket holes, I wanted to make it go all the way to the edge of the film so that the sprocket holes were in the image.
The only adaptor I could get was a standard 35mm one which just had a 36mmx24mm cut out. Below is how I adapted the adaptor 🙂

Shot from the camera after it had been converted.

This was the part that I found with no back and the flash not working

It was missing the back, which made it pretty unusable.

This is the 35mm adaptor I bought which had a back and a film holding plate.

The only 2 tools required for the conversion… A flat file and a saw (mine had a jewellers blade which lets you cut 360 degrees rather than just straight)

After it had been cut out and the plate filed smooth.

The adaptor plate in the camera.

Film loaded and ready to go.

Lots of insulation tape.

The 35mm adaptor came with a sticker that you put on the frame advance knob. I advance the film 2 frames instead of 1 for each shot.

This is why I ended up using so much insulation tape on the back of the camera. Some people like this effect but I would rather not have it 🙂

End result… I scanned it on my CanoScan 9000F Scanner which scans 120 film by just laying it on the scanner bed… Im going to make a custom scanner mask to hold the film flat sometime in the future 🙂
Enjoy
Holga Panos
Another test roll through the Holga I found and adapted into a 35mm pano camera… I’m liking how these are looking… Next might have to try colour negative…


 Holga 120 with Custom Pano cut out for 35mm, Ilford Delta 100 (Expired), CanoScan 9000F Scanner.


Recent Comments