How It Was Done: Pink Bubble
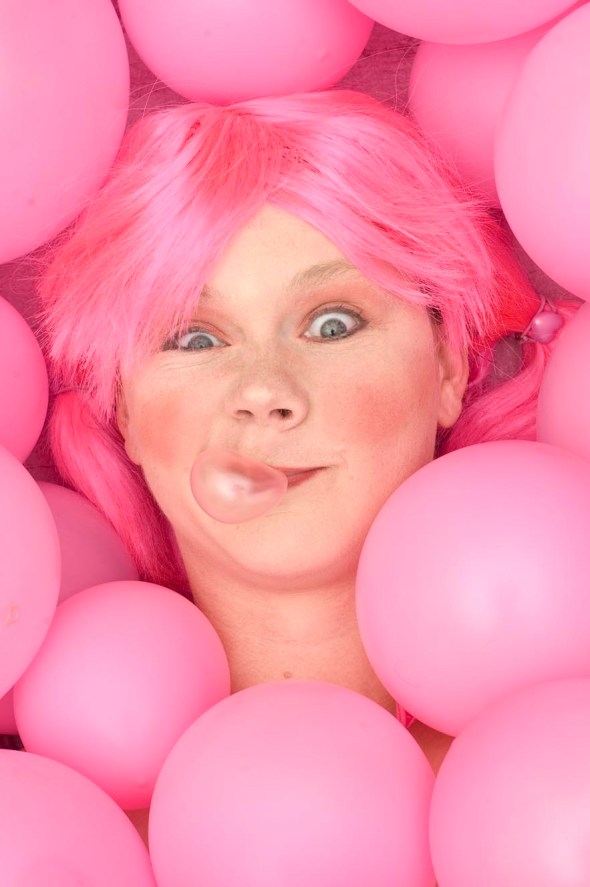
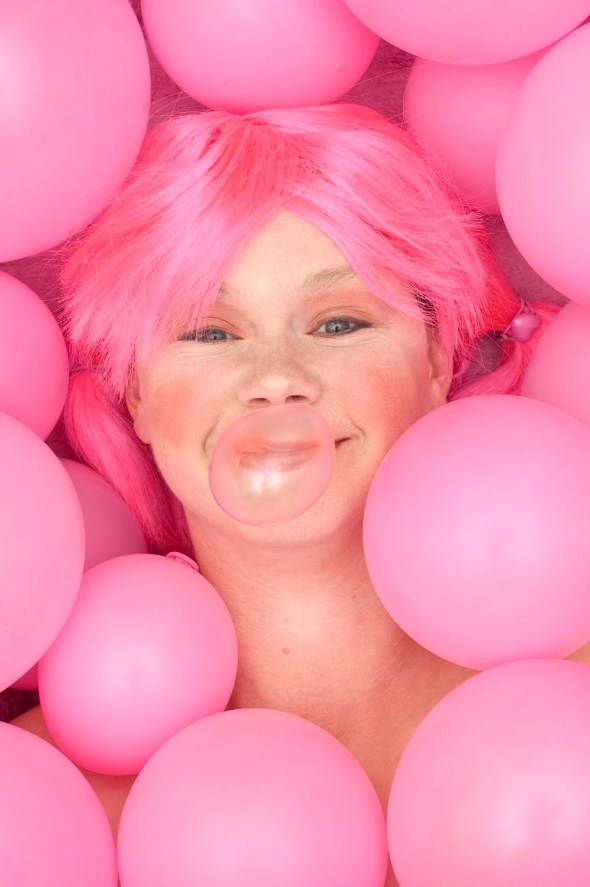
Yet another “How it was done” post…This time for my entry in the Canon Photo5 competition under the brief “bubblegum portrait”
This was my entry… Just incase you missed it 🙂
Anyway the brief was…
Bubblegum/Portraiture
This brief has one rule:
Feature bubble gum in a portrait. How you or your subject use the bubble gum is up to you. If you need more gum, visit your friendly local convenience store.
Note: For this competition we’re defining a portrait as any shot where a person is the main subject.
Once again it seems simple enough….
I wanted to do something that was entirely pink but a real soft kinda pastel pink which would tie in with the colour of the bubble being blown.
After a couple of days thinking about it I kept coming back to the idea of someone blowing a bubble while being surrounded by bubbles… I know it seems like an obvious conclusion to make but I wanted it to be shot and lit super well which I hoped would make the concept stand out from any other entries which used a similar premise. Not that it worked out in the end after not making it to the finals and public voting…Not that I’m bitter or anything 🙂
So I scored a reasonable sized cardboard box from recycling at work went and bought close to 100 pink balloons and 1 pink (very pink) wig.
For once Amanda was pretty stoked to be in the photo since she liked bubblegum anyway.
Using my 2 500W Electra Studio Lights both pointed at the ceiling (one of the few ways I can use them to get a softer light since they only have full and half power) I put the box in the middle of the room with a pink piece of material over it (with 2 daughters there never seems to be a shortage of pink material around) and got Amanda to lie with the head and shoulders in it.
The light was metered at f11 at 125th of a second using ISO 200.
Amanda spent quite a bit of time on the makeup which needed to be pretty thick due to the close nature of the shot… I think she did a pretty darn good job of getting what I wanted from what I told her.
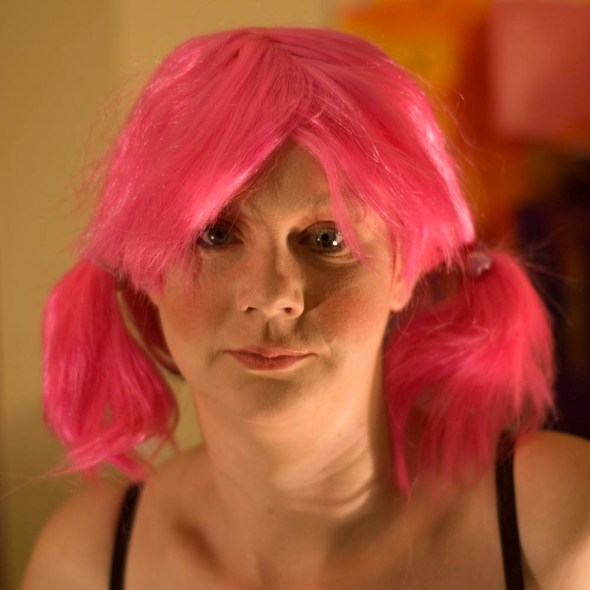 Not a particularly flattering image but you get the idea how much went into it
Game on!
I ended up only blowing up about 25 Balloons and after Amanda lay in the box they were arranged around her head to make it look like she was entirely surrounded by pink bubbles.
Anyway this is how the set looked…
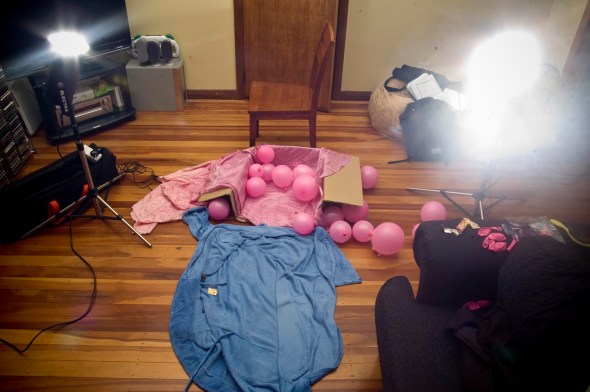 Again I love how budget my studio is 🙂
So after a lot of false starts and misblown bubbles we started to hit our stride… To get the angle I wanted I needed to be directly above her which required me standing on a chair and at some stages of the shoot standing on 2 chairs, which when 1 moved I nearly did some serious damage to my groin… mental note to self: when standing on 2 chairs always make sure they are well anchored.
The angle ment that you can see me taking the photo quite clearly in Amanda’s eyes
Anyway here goes some more shots that didn’t make it but that I still liked… Enjoy… Oh and if you don’t hear from me again Amanda has killed me for putting up more photos 🙂 Dont call the police it’s just the risk I take 🙂 and the girls need at least 1 parent.
 Note to Amanda: Dont breath in through your nose when blowing bubble 🙂
Nikon D70s, 50mm f1.8, 200 ISO.
How It Was Done: Smokin Grater
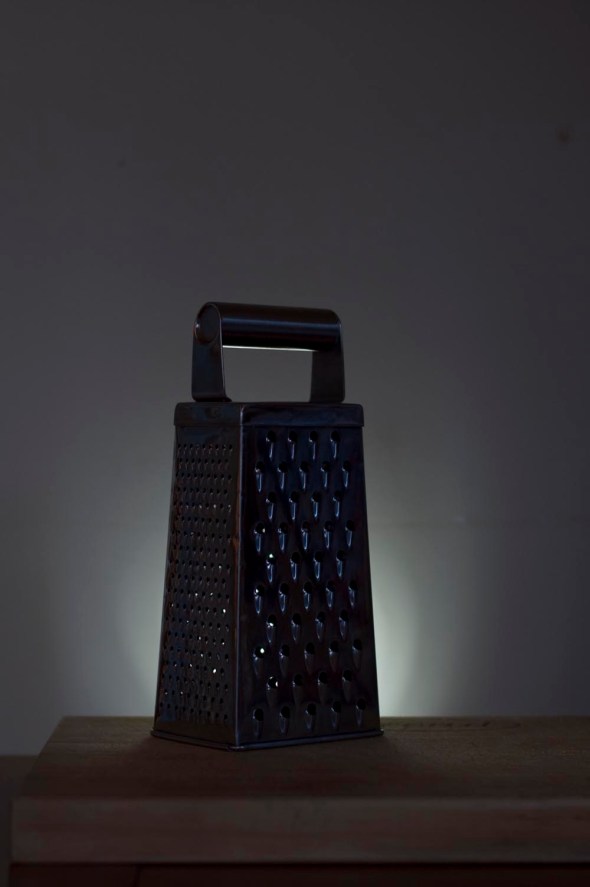
Here goes another how it was done post, this time on my Photo5 entry I called “Smokin Grater”. The finalists are announced today sometime and then the other contestants vote on who they think should win. There are about 8000 entries so I’m not holding out too much hope of being a finalist… but you never know 🙂
For those of you who missed it here goes the image I submitted.
So the brief was as follows:
Incense/Black and White
This is a moody brief. Use smoke from the incense to create ambience and atmosphere in a black and white photo. It’s not just about shooting smoke, but capturing the essence of black and white photography in a dramatic way.
Once again this seems simple enough:
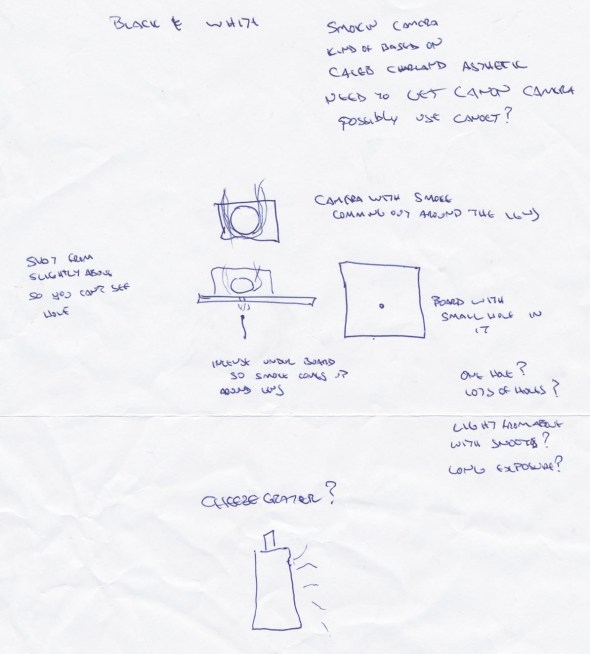
Thanks to my new scanner I can now show you my pre shoot thoughts 🙂
So the original idea was to sit a camera on a board with the lens above a hole and let the smoke rise up and around the lens. Taken from a slightly high angle where you couldn’t see the hole it would like the camera was smoking.. I also had plans to throw a stack of photos so it looked like they were exploding out of the back of the camera…
Anyway after a bit more thought I thought it would be more amusing to use a cheese grater and make it look like it was smoking due to over grating…
I really like the aesthetic of photographer Caleb Charland and wanted to try to emulate his clean images (turns out it’s really really hard to make images look as clean as his 🙂 )
So the idea was to use a long exposure to give a very hazy smoke presence…
I put a snoot on a speedlight and placed it under the table and had another speedlight bouncing off the ceiling.
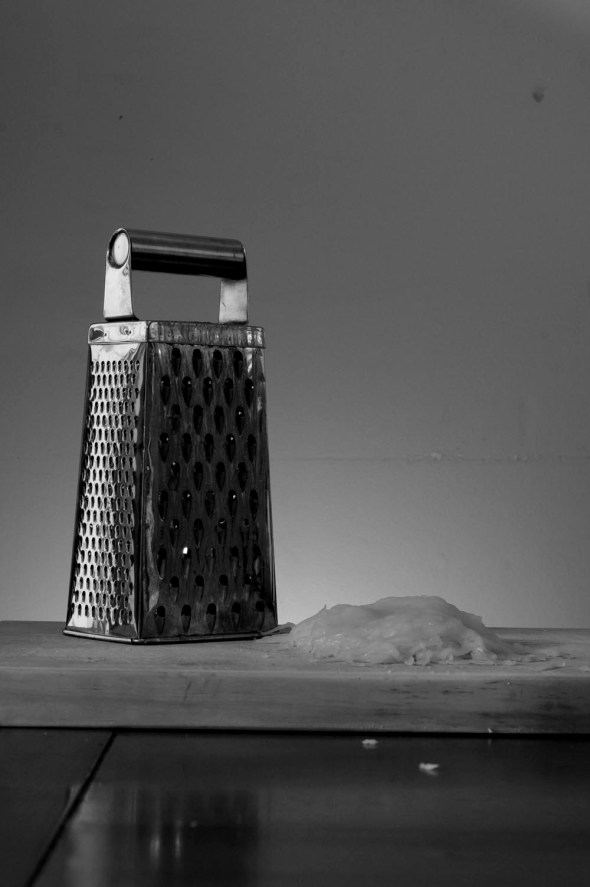 After adding a pile of melted cheese (which ended up being melted by a fan heater after all else failed) I started playing around with the incense to see what kind of smoke effect I would get… About an hour later there was still no sign of smoke and I was starting to get a bit frustrated….Grrrr…
About now I throw my hands up in despair and walk away and go have a shower…
When I come back I decide to scrap what I have done and start again.
I decided to use a black background and a light globe on one of my speedlights and see what happens.
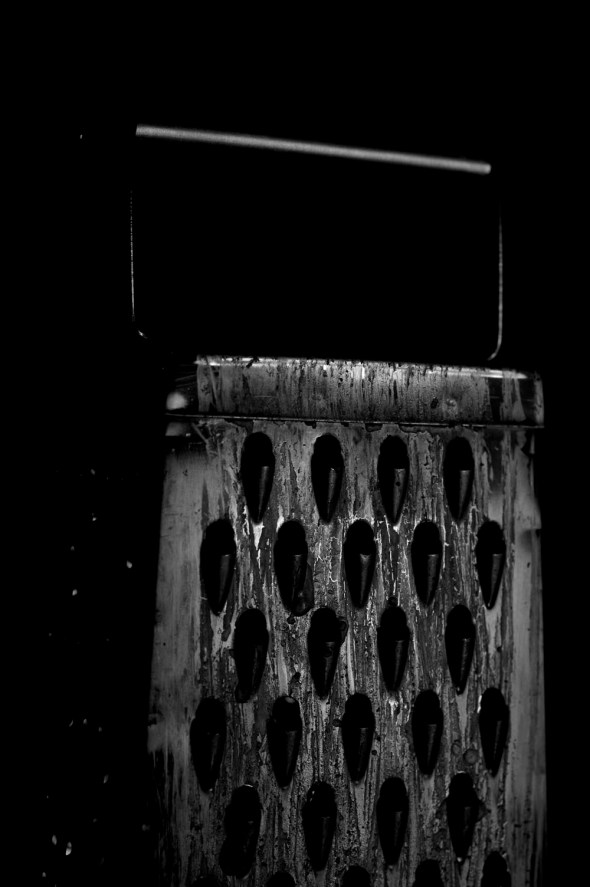 This was the first shot off the camera after setting things up… at this point things are looking up 🙂
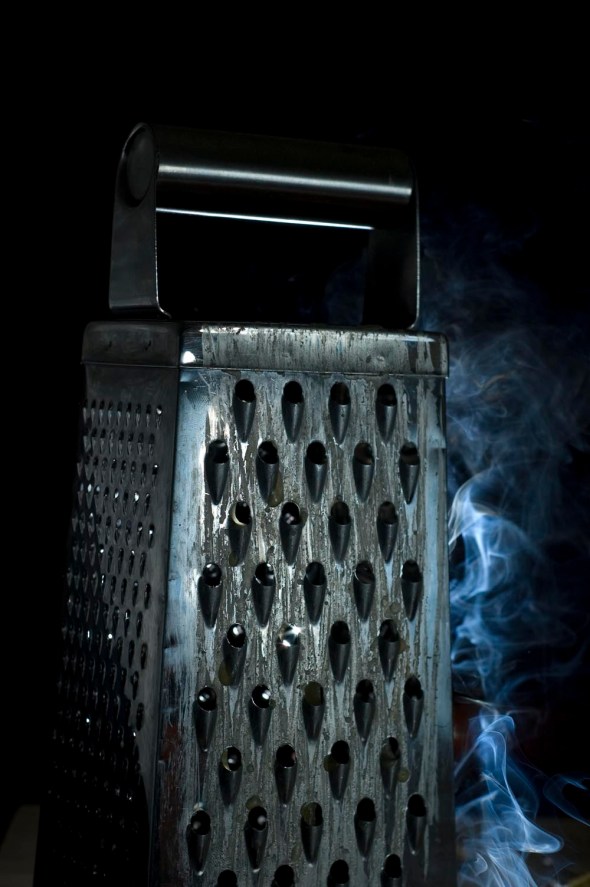 So now its time to add some smoke and a snooted speedlight behind to highlight it with a silver bounce off to the left to reflect a bit of light back onto the grater.
This is how the setup looked at this point:
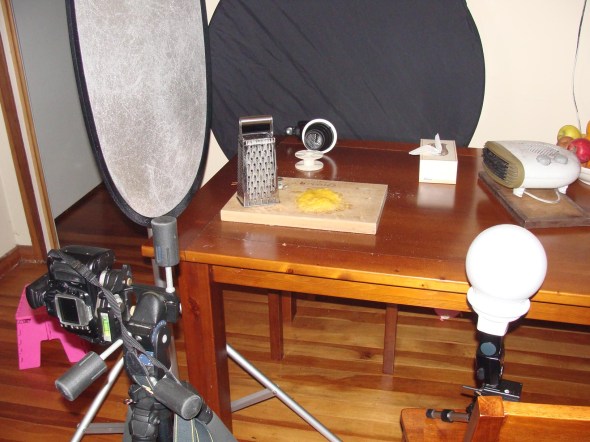 Again my studio is Soooo high-tech… 🙂
After quite a bit of playing around I found the best way to show smoke up is to backlight it… It was a lesson hard learned and if I had known this previous it would have saved me many an hour 🙂
A slight re-jigging of the composition and …
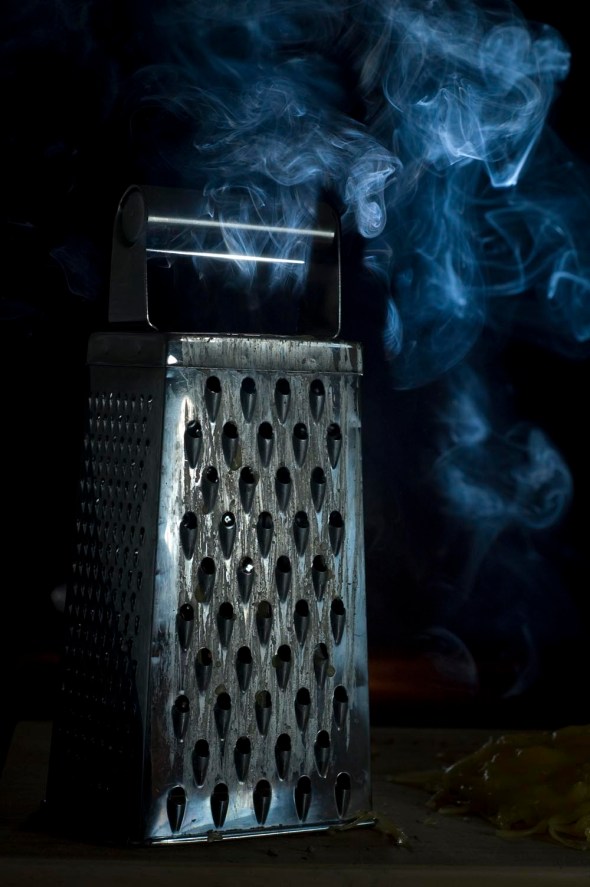 Image straight off the camera with no processing
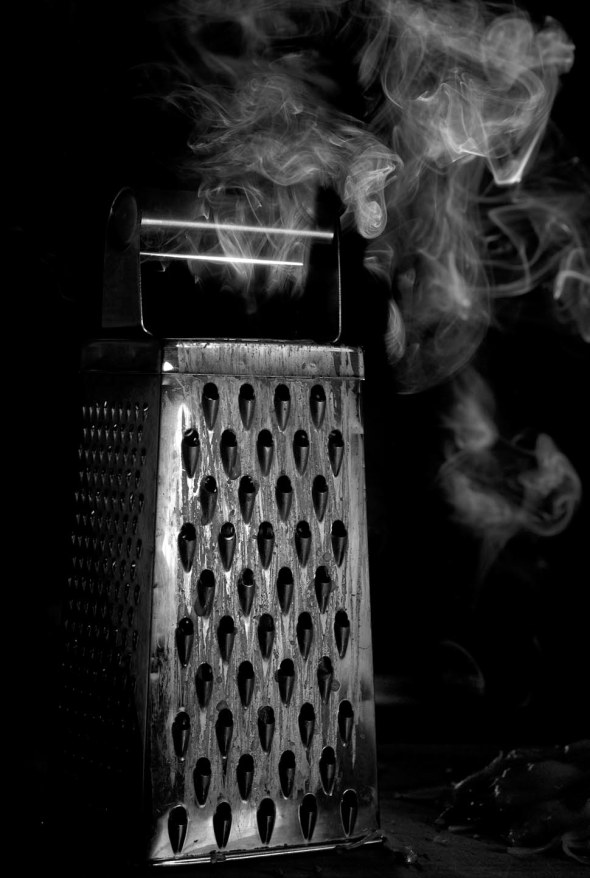 Processed to Black and White using Adobe Lightroom with a bit of retouching in Photoshop to take out the hotspots from the incense inside the grater.
Nikon D70s, 50mm f1.8 Lens, ISO 200. SB24 Speedlight with Globe and SB80DX with Snoot. Black reflector as backdrop and Silver reflector as bounce.
How It Was Done: Water Drop Shot
Ok so I havent done one of these in a while and the entry’s for the Photo5 competition have closed so theoretically no one can copy this for the competition.
Anyway here is the finished image that I submitted to the competition….
Competition Brief: Eye Dropper
This brief is asking you to use your lens to look closer. Use the eye dropper to place drops of liquid in any arrangement you want. You can use a single drop, or as many drops as you like.
And you’re not limited to just water – feel free to use liquids of different colours and consistencies, such as milk or tomato soup. Just make sure you get close.
OK that seems simple enough…
I had the idea to suspend a drop of water from the head of a pin and using a slide projector somehow get an image into the drop (at this point I want to say that using Photoshop wasnt an option that I really wanted to use).
Equipment Used: Kinderman Slide Projector, Nikon D70s with 50mm f1.8, 2 x Nikon PK13 and 1 x PK12 Extension Tubes, Tripod, Cullman Macro Rail, Various supports like chairs, 1 x Pin, Bluetac and a 42″ translucent reflector (used later on)… Oh and various slides.
So I set up the projector at the same height as the camera and blasted a slide onto the drop of water (which took at least 15 minutes to get to stay on the head of the pin) which produced the following image.
Even at 1/5000th of a second this was about as good as it got… Not really the look I was going for…
Step 2: Place a 42″ reflector in front of the projector to act as a screen… At the moment the projector is about 1.5 metres away from the water droplet.
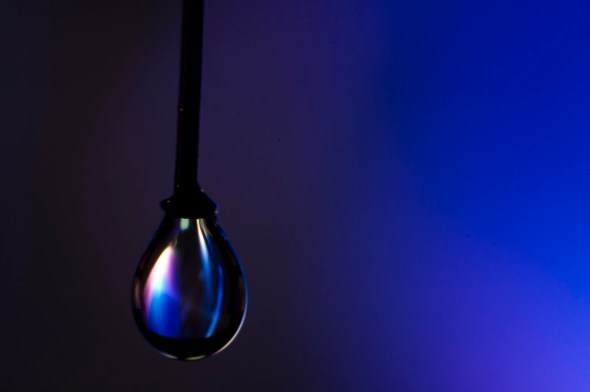 Ok at this point I stop thinking “what the heck am I doing this is never going to work I must be crazy”! And start seeing a small glimmer of hope projected down a very bright slide projector.
However still not really what I had in mind when I initially set out.
Step 3: Time to move everything back away from the projector… now about 3 metres away still with the reflector in front acting as a screen.
I keep forgetting stuff… The slide was projected onto the screen upside down so that it was right side up in the droplet.
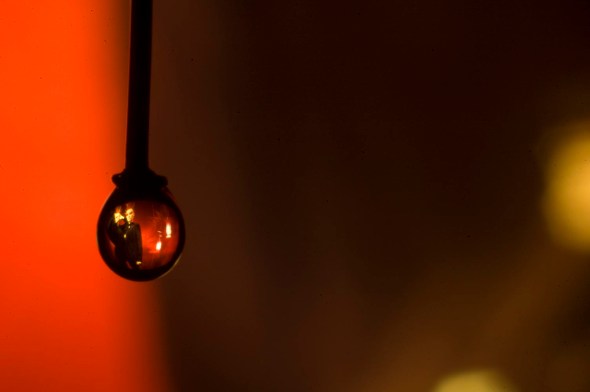 OK now we are cooking but still not quite right.
This is what the setup currently looks like (the images are from a point and shoot so sorry about quality/focus issues)
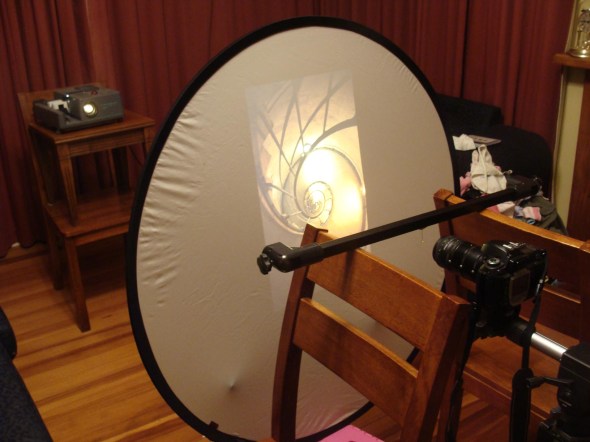 My studio is soooo sophisticated 🙂
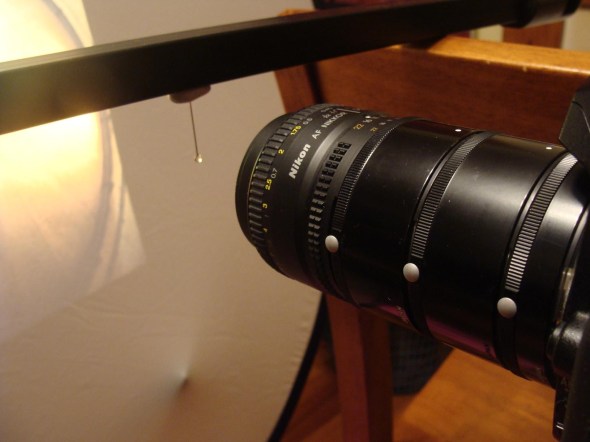 Who needs a macro lens when you have a bazillion extension tubes…
Opps almost forgot to say that I added a small pop of speedlight at the pin just to give it a bit of a catch light.
Anyway I found that by moving a reflector backwards and forwards I could alter how much of the image would appear in the drop so after a lot of stuffing round (293 images from the first shot) this is the image that I liked the best…
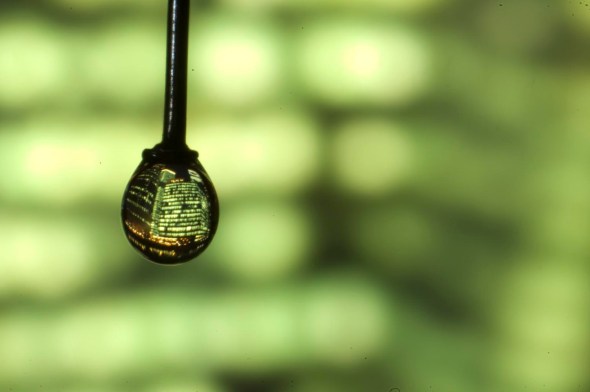 This is the file straight off the camera with no processing
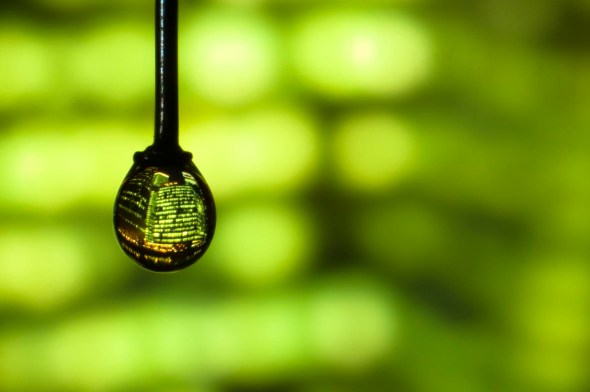 With a bit of straightening and a saturation boost and not to mention all the dust removal here we go 🙂
And before I forget here is a scan of the slide that I used…
All droplet shots on Nikon D70s with 50mm f1.8 Lens with 2 x Nikon PK13 + 1 PK12 Extension Tubes.
How it was Done 2
Here goes another “How it was Done” Post
This is the setup for the image that I use for the header of my page. I took this middle of last year and hopefully it again shows how you can get good results without much of a studio or too much equipment.
Equipment Used: Portable Backdrop Kit x 1, 500W Electra Compact Flash with barn doors x 1, Superclamp x 1, Nikon SB80DX Speedlite x 1, Nikon D70s with 18-70mm Lens x 1, Remote shutter release x 1, Tripod x 1.
 Shot 1: This is my lounge complete couches, bookcases and even folded washing stacked randomly around. I did move one couch so I had enough room to set up the portable backdrop kit across the room so i could hang the studio light off it pointing directly down and then used the barn doors to create a circle of light on the floor.
With shots like this I usually use something like a chair to act as a reference for focusing the camera.
Lens at 28mm f3.5 at 1/8 second without flash going off.
 Shot 2: Same shot as before but with the camera lens shut down to f18 and at 1/125th of a second. Using a reasonably fast shutter speed with studio or speedlites means that anything not in the direct light will be much darker. Even though you can see some of the surrounding things in the room these will be easy to remove in Photoshop later.
Shot 3: Enter the model (me). Using the remote shutter control with the camera set to 2 second delay I fired off a couple of shots to see how the lighting looked. I was pretty unhappy with the result since it left no light in the face when I had the hood up. Apart from this the general feel of the spotlight effect was pretty good.
 Shot 4: I added a speedlite to the shot which was set off by the main strobe and set it to half power. This fixed the problem with their being no light on the face while still maintaining the spotlight effect.
 Shot 5: After checking the lighting on my computer I decided it was “Go Time”. Since this was a dark and dramatic lighting situation I tried to put as much tension into the pose as possible (the way the shoulders are held and the was the hands are clasped). The remote is palmed in my left hand so you cant see it and the speedlite held in place by my feet and legs. It wasnt the most comfortable pose that’s for sure, with any movement making the speedlite move and have to be repositioned.
This shot was the best of the ones I took. All up with the test shots I took around 140 images.
 Shot 6: Ok I now have the image I want so its off to process in Lightroom.
Corrections Made: Sharpening, Noise Reduction, Vignette (to remove more of the background), Desaturation and Black Clipping (again mostly to remove the background).
As you can see this still isn’t perfect, especially with the light stand in the right of the frame.
From Lightroom into Photoshop to remove the last few bits of background and generally tidy things up and then a quick crop and Done!
Final Image Nikon D70s with 18-70mm lens. f18 at 1/125 second
Enjoy
How it was Done
After good feedback from the last post about how it was done, here goes details about how the shots I put up yesterday were captured:
Hopefully this shows that you dont need lots of fancy equipment and a studio to get reasonable images.
Equipment Used: 1 x 10 metre power cable, 1 x multi plug box, 2 x light stands, 2 x 500W Studio lights with 150W modelling lamps, 1x softbox umbrella, 1 x barn doors, 1 x tripod, 1 x Nikon D70s with 18-70mm Lens, 1 x 1GB CF card and 1 x Nikon ML3 wireless camera remote. This effect would be easy to replicate using a couple of house lamps in a dark room with a bit of ingenuity.
 Shot 1: Overview of the garage that was turned into a studio. Had to run 10 metre power cable from the house to run the lights.
 Shot 2: Set the light with the barn doors pointing at the back wall to control the amount of light that was falling on the wall and the light with the umbrella about 2 metres away from the back wall pointing across the shot to avoid shadows falling on the back wall and creating a heavy side lighting effect. Both lights were set to full power but the strobes were turned off.
 Shot 3: First test shot with camera set at f3.8 at 1/125 sec 800 ISO this was with the garage door open which let in more light than I wanted as well as the bluish colour cast at the bottom of the image. I also didn’t like the shadow in the upper right of the frame and so adjusted the barn doors to take this out.
 Shot 4: After closing the garage door and setting the camera focus to about 1.5 metres as well as adjusting the camera to f5.6 at 1/60th second I took the first shot with me in it. With self portraits its always difficult to pinpoint where you are supposed to stand, most of the time it’s just trial and error… I sometimes put a light stand in the shot to get the centre and to use as a reference for focus… This time I just guessed and was off centre which I liked anyway. After looking at this shot on a computer I liked the way the light on the wall darkened at the right and the light on me darkened on the left. I knew there would be enough information to make it easy to add more drama in Lightroom and Photoshop.
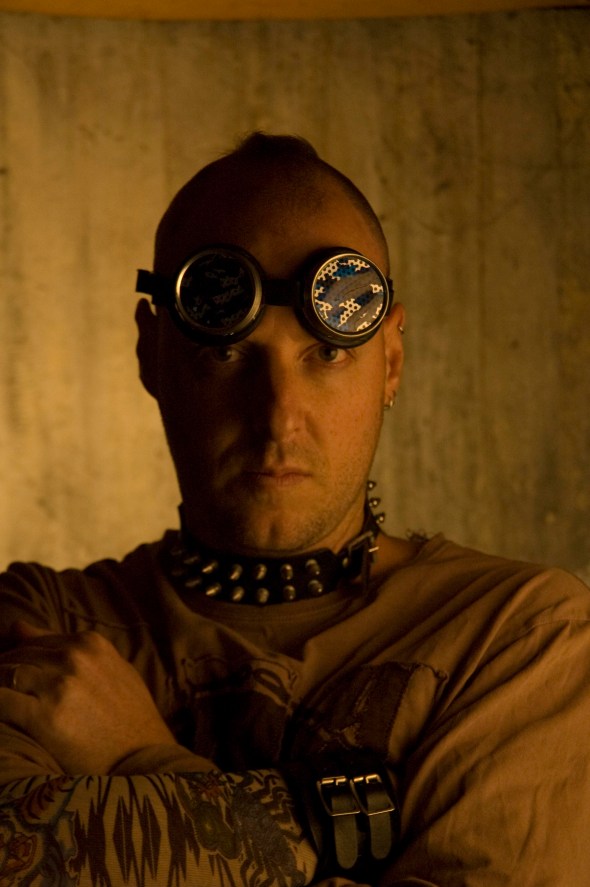 Shot 5: Props and Action! Yes I did give myself a Mohawk for the day just for the heck of it (its gone now) This is shot no. 23 Unprocessed straight off the camera in Raw. I have to say its the weirdest feeling using studio lights and setting off the camera with none of the usual loud popping noise that accompanies strobes going off.
 Shot 6: Final Rendition. Image has been recropped and Lighroom adjustments have been made to make it darker and more dramatic (Direct Positive, Vignette and Exposure decrease). I have a tendency to make stuff darker rather than lighter since that seems to be my base aesthetic.
If people keep showing a continued interest in this type of post then I will try and make it a more ongoing subject of this blog.
Let me know.
Si





Recent Comments